Mark2 Software
Introduction
In order to operate your printer, you will need a few different pieces of software. You will need a slicing program, which converts a 3D model into a series of GCODE commands (instructions that the printer's electronics can understand), and a host program, which is responsible for loading the sliced file, and sending it to the printer via USB as the print progresses. Additionally, if you want to design the model to be 3D printed, you will need a suitable CAD package.
There are a lot of different software options out there - two common (and free) choices are Slic3r (for slicing the 3D model) and Pronterface (for sending the GCODE to the printer). We'll cover how to get these programs up and running below.
For a more complete overview of the 3D printing toolchain, including other software recommendations, please see the RepRap Wiki page.
Getting Started
Printrun / Pronterface
Pronterface is a 3D printing 'host' program. It allows you to connect to your 3D printer, and send commands. You can send commands manually - to move the axes around, set temperature, and so on - or you can load a GCODE file and use the program to send it to the printer, in order to print an object.
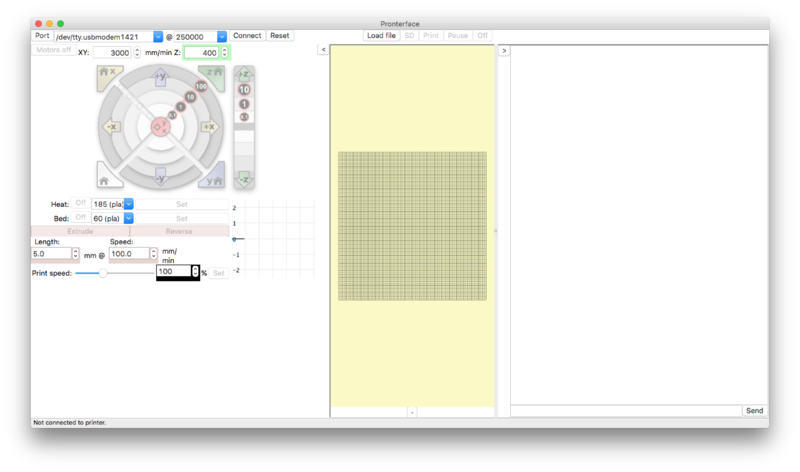
To get started, download Pronterface. There are versions available for Windows, OSX, and several Linux distros. Open the software, and you'll be presented with the following screen:
Let's get started by connecting to the printer. You'll need to have the printer connected via USB, and the power supply should also be plugged in and turned on (we'll want to try and move the motors in a minute, and that needs power). In the 'Port' dropdown box, select the COM port that corresponds to the printer. On Windows, this will be a COMX style designation. On OSX or Linux, it will be designated as shown in the image. If you don't know the COM port, disconnect the printer, and see which listing disappears (you may need to open / close the dropdown or the program for the change to take effect). In the '@' box, select 250000 - this number is the baud rate, the rate at which the printer and the software will communicate with each other. This rate is set in the printer's firmware. After you've set these values, press 'Connect'.
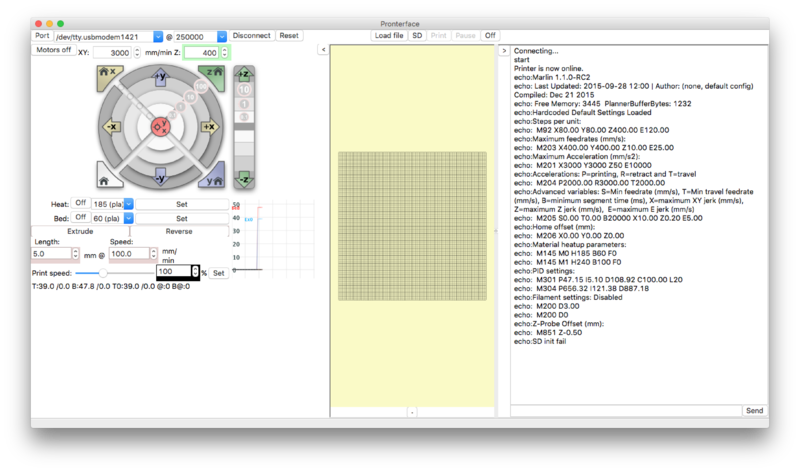
After a moment,the console window (right) should indicate if the connection was successful. If it is, the printer will communicate a bunch of information about the firmware and the configuration to the program, as shown.
If the connection is not successful, you'll see a different message. If this is the case, double check all connections, and make sure that you've uploaded the firmware to the board.
Slic3r
Download Slic3r from slic3r.org.
Extract all of the files, and run 'slic3r.exe'.
Run through the first time configuration, or ignore it and use our provided Slic3r configuration.
Download the Slic3r configuration from the Mark2 repository here.
In Slic3r, select File>Load Config Bundle, then select the downloaded file.
You'll likely want to change settings to suit different materials, object properties, and so on - but this configuration should be a good starting point to build on.
Testing the Printer
- Connect with Pronterface
- Heat things up
- Test Endstops
- Move things around
- If something doesn't work, double check all connections (with power off). Check troubleshooting page.
Going Further
OctoPrint
Usually, you need to leave a computer plugged into your printer to run it. You can get around this a few different ways - one option is to use the on-board SD card socket in the LCD control panel (now a standard option on all Mark2 printers).
OctoPrint is another option. Instead of using the SD card, with an Octoprint installation we setup a small single-board computer (typically a Raspberry Pi) to take the place of your normal desktop or laptop computer. The Raspberry Pi mounts on the printer frame, and takes up little space. It can then be connected to your home network, either by WiFi or ethernet, and this allows you to control your printer from a web browser.
The advantage to this approach is that allows more thorough and detailed control than the LCD panel and SD card, while still removing the need for you to tether your usual computer to the printer.
Cura
Cura is an alternative to Slic3r and/or Printrun. It includes both slicing and host software, and can be a very user-friendly all-in-one program.
Recent versions of Cura seem to have reduced support for non-Ultimaker printers, however the software should still be usable with some configuration.
Simplify3D
Other slicing programs are mentioned above, such as Slic3r and Cura. Another program that can fulfil this function is Simplify3D. Unlike the other slicers, Simplify3D is not free software. The different slicing programs all have strengths and weaknesses, and often your chosen slicer will be a personal preference. Quite a few people believe that Simplify3D is more capable in some areas than other slicers - we use it in house for all our printing, including printing the parts for the Mark2 printers. We suggest giving it a look - but we'd only recommend buying it if you're using your printer pretty heavily, otherwise the cost can be tough to justify.
Here's the Simplify3D profile we use for printing on our Mark2 printers.
Resources
http://reprap.org/wiki/RepRap_Options#CAM_Tools

