TinyFan

Introduction
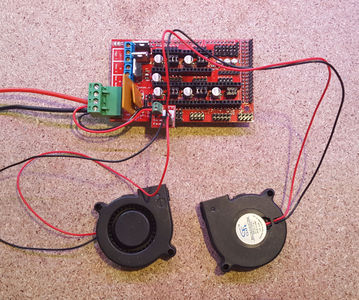
TinyFan is a handy little board that attaches to RAMPS, and allows you to control an extra two fans. TinyFan is ideal for dual-extruder systems, when you've used up all RAMPS’s MOSFETs on your HotEnds but still need to get a few fans up and running.
If you're looking to run even more fans, check out MightyFan.
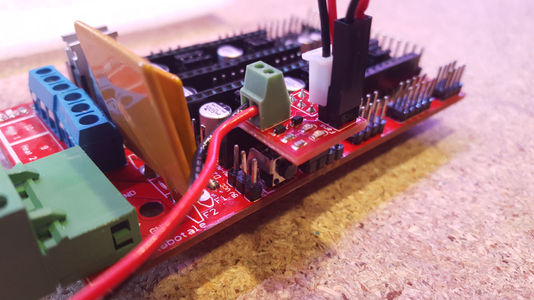
We designed TinyFan to be as easy to use as possible – an onboard screw-terminal makes it easy to provide power, simply run a short set of wires to the main screw terminals on RAMPS.
TinyFan has two fan outputs – each with an indicator LED and flyback diode for protection when using larger fans. TinyFan can also be used to control LEDs, or even heating elements – we've used TinyFan to power a HotEnd cartridge! Check the specifications for recommended power ratings.
TinyFan plugs directly into the ‘Servos’ header on RAMPS, and any attached fans are controlled by pins D11 and D6. Most printer firmware supports using these pins to control fans – we've got details on modifying Marlin below.
Running a 24V printer? TinyFan can handle it, just make sure your fans can! TinyFan will run on an input from 5V-25V, and because it’s fully PWM-controllable, you can always run your attached fans at any voltage lower than the input – so you can use 12V fans with a 24V supply! Just make sure you limit the PWM value to 50% in firmware, and your fans will run happily!
Features
- 2 PWM Controllable Channels (D6 and D11 on RAMPS)
- Vin: 5-25V
- Max. Current: 3.5A / channel
- Flyback diode on each channel
- Indicator LED for each channel
- Dimensions: 15.5x15.5mm
Firmware Modification
Here's a quick guide on modifying Marlin to run attached fans.
First off, you should figure out how you want these fans to be controlled. By default, Marlin supports a print fan which is controlled by M106 and M107 - this is the fan that your slicing software usually controls to cool the print, and on RAMPS this fan is usually connected through the MOSFET on D9. If you're running a dual-extruder setup, you've lost this fan output and probably want to get it back. Let's do this!
GCODE Controllable Fan
Navigate to and open the pins.h file. Look for the section titled "Arduino Mega Pin Assignment" - specifically, the part shown below:
#if MB(RAMPS_13_EFB) || MB(RAMPS_13_EFF) || MB(AZTEEG_X3) || MB(AZTEEG_X3_PRO)
   #define FAN_PIN            9 // (Sprinter config)
#else
   #define FAN_PIN            4 // IO pin. Buffer needed  <- Change this pin to match TinyFan. Either 11 (output 1) or 6 (output 2).
#endif
Change #define FAN_PIN to either 6 or 11, depending on which output you want to use on TinyFan. This assumes that you've defined your RAMPS board as RAMPS_13_EEB (Extruder, Extruder, Bed) in Marlin's Configuartion.h. If you're not using this configuration, you may need to edit the other #define FAN_PIN line.
Now that this is done, you should upload the code and test your configuration. Sending M106 S255 to your printer should cause one of the LEDs to light up, indicating that fan output is switched on. If not, double check you're firmware settings, and check with the troubleshooting section.
Temperature Controlled Fan
That's one fan done - but you were promised two, and you have big plans for that second fan. Fair enough! Let's set up a temperature-controlled fan that will come on automatically when your HotEnd is above a set temperature - great for keeping your HotEnd cool when your printer is running, and keeping things quiet when nothing is happening.
Open Marlin's Configuration_adv.h file. Look for the following lines:
#define EXTRUDER_0_AUTO_FAN_PIN   -1  <- Change this pin to match TinyFan. Either 11 (output 1) or 6 (output 2).
#define EXTRUDER_1_AUTO_FAN_PIN   -1
#define EXTRUDER_2_AUTO_FAN_PIN   -1
#define EXTRUDER_AUTO_FAN_TEMPERATURE 50
#define EXTRUDER_AUTO_FAN_SPEED   255  // == full speed
For our example, let's say we want to keep our first HotEnd cool whenever it's running - we'll need to edit the first line, #define EXTRUDER_0_AUTO_FAN_PIN. Change the value from -1 to either 6 or 11 (whichever you haven't already used). If you want to, you can edit the threshold temperature - but 50C is a fairly safe number already. We want the fan to run at full speed whenever the HotEnd is in use, so we'll leave the last line set to 255.
Again, you should upload the firmware and try it out. If you're running a HotEnd that shouldn't get too hot (E3D V6, Lite6, anything with PTFE, etc) you might want to make sure you have the cooling fan running just in case - maybe connect it to the other output and set it manually using M106 S255 for the time being. Heat the HotEnd up so it's above the threshold (default 50C) temperature, and check to see if the indicator LED turns on. If it does, awesome - you can connect your HotEnd cooling fan to this output now, and you're good to go!
Driving High-Power Devices
TinyFan wasn't designed to drive big loads - but provided you're reasonable it's surprising what it can do! We've successfully tested TinyFan powering a 12V 40W ceramic cartridge heater (the type typically used in HotEnds) without any signs of distress. If you use it for something unexpected or unusual, let us know!
TinyFan uses a MOSFET with a very low RDS(ON) value, which means it's pretty efficient at what it does - not a lot of energy is wasted as heat, which is nice. TinyFan should stay cool to warm under most loads - if it's become uncomfortable to touch, then you might be asking too much of it!
Troubleshooting
Make sure power is connected via the screw terminals. Also make sure the polarity is correct - indicators are present on the board. Check that the wires aren't shorting on each other as they enter the screw terminals.
You can download the following test sketch in order to quickly check if the fans are running correctly. Use the Arduino IDE to upload it to your board (as you would with the Marlin firmware).
void setup() {
 pinMode(6, OUTPUT);
 pinMode(11, OUTPUT);
}

void loop() {
 digitalWrite(11, HIGH);
 digitalWrite(6, LOW);
 delay(2000);
 digitalWrite(11, LOW);
 digitalWrite(6, HIGH);
 delay(2000);
}
Once the code is running, the LEDs on TinyFan should blink alternatively. Connect fans to the outputs and check that the fans spin up when the associated LED is lit.
Note that the sketch will run any attached fans at 100% - so if you've got a 5V fan hooked up with 12V power input (for example) you will damage the fan. Either remove the fan, or modify the digitalWrite(x,HIGH) to analogWrite(x,100), where x is either 6 or 11.
If the LED is lit but the fan doesn't spin up, there might be a problem with your fan. Check the voltage your fan requires - it's usually marked on the label on the fan. Whatever voltage you're supplying TinyFan with (the power through the screw terminal) will go into the fan - so if you're trying to run a 24V fan off of 12V it might not spin up. Likewise you should avoid running a fan above its rated voltage - don't use a 5V fan with 12V - unless you're using PWM to limit the voltage going to the fan.
Source Files
TinyFan is open source hardware - all source files are available on GitHub under the GPL V3 License.
Purchase
TinyFan is available to purchase from the Aus3D store. As TinyFan is open-source, you might find it crop up elsewhere too!
Resources
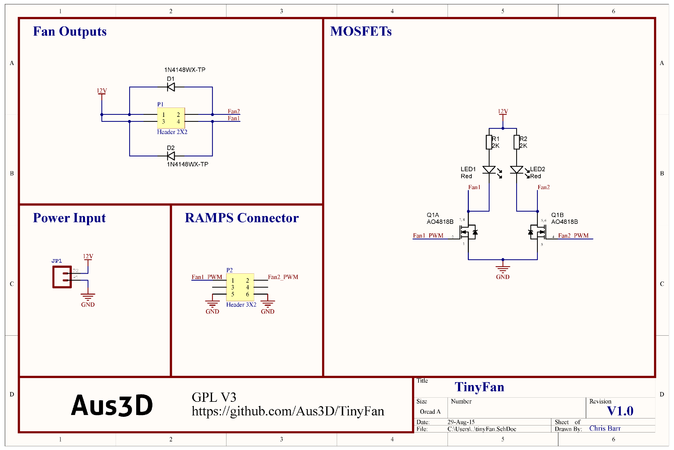
Schematic
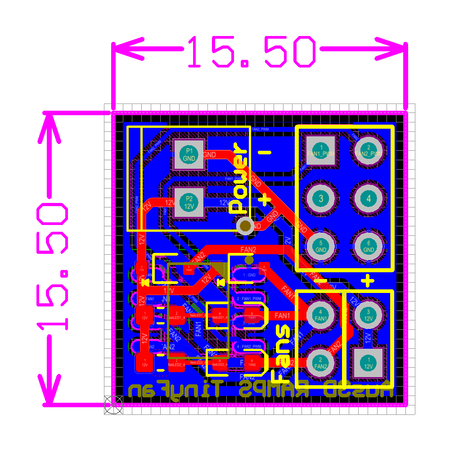
PCB Layout


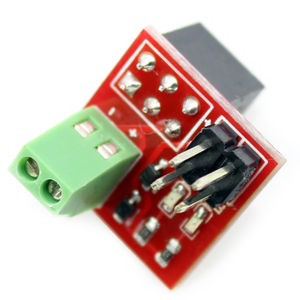
Assembled Board Top
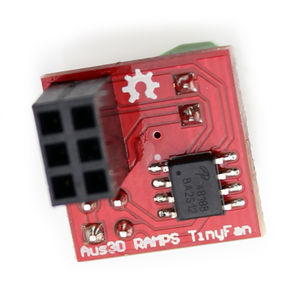
Assembled Board Bottom
Connected
Wired to RAMPS power terminal
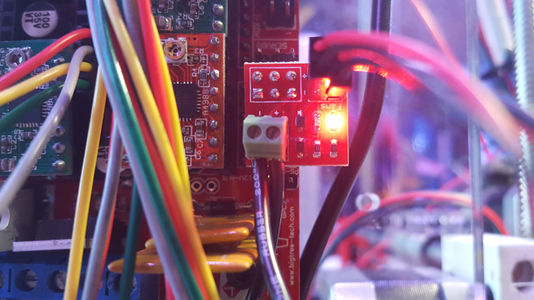
TinyFan in operation


