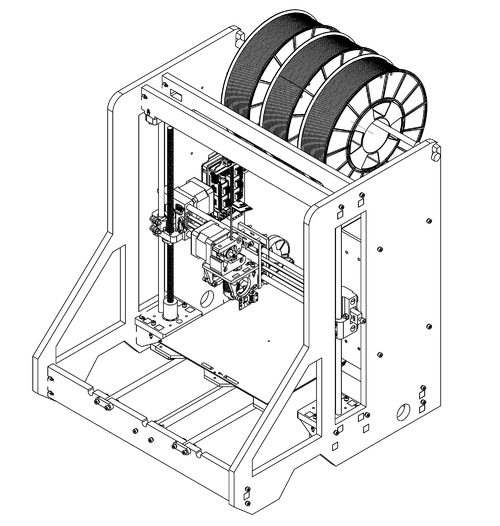
Mark2 Assembly
Getting Started
First things first - thanks for your support! We appreciate your business, and hope that your experience with our printer is a happy and productive one! If you get stuck, and you can't find the answer you need here, feel free to contact us - we'd be happy to help!
General Notes
Here are a few important notes before we proceed with assembly.
Our acrylic frame is as sturdy as they come, but over-tightened screws can still cause damage. Spring washers significantly reduce the chance of damage, and ensure that bolts stay tight long after assembly. Be sure to use one of the included spring-washers on every bolt that comes into contact with the acrylic frame. 99% of the time it is sufficient that bolts are only hand-tight. You can always attempt to further tighten things later if you feel the need to, but hand-tight should do the job. If you attempt to tighten bolts as far as they can go, you will damage the frame.
Test all linear bearings before using them by running them along one of the included smooth rods - sometimes they have too much grease applied internally, which can make them resistant at first. If this is the case, rinse the bearing under water briefly, dry as best as possible, and try running along the smooth rod again. Over time the grease will spread through the bearing, making them smoother - running the bearing along the rod a few times may help. Generally, after rinsing and some motion, the bearings should be smooth enough to move under gravity when the rod is held vertically.
Many of the images in this guide are animated - click on them to see the animation.
Let's Go!
To get started, find yourself a nice, open space to work - a table or workbench is ideal. Open up your kit, and grab all of the included parts out and arrange them nearby. After unboxing everything, take the time to compare the bill-of-materials (BOM) against the contents of the kit. We work hard to make sure everything you need is in the box, but it's good to double check. Many components come inside one of the labelled boxes - if you're having trouble finding a part, check the BOM to find out which box it should be in.
Once you've got that sorted, it's time to get the acrylic parts ready. You'll want to peel the protective paper coating off of the acrylic before putting the printer together. Using a sharp knife or fine pair of tweezers can make it easier to separate the paper from the acrylic. This can take a little while - whether you want to do it all in one go, or bit-by-bit as you assemble the printer is up to you.
Main Frame Assembly
Z Motor Brackets
Requires:
- 4x z-motor-brace
- 2x z-motor-bracket
- 4x M3x20mm Bolt
- 4x M3 Spring Washer
- 4x M3 Hex Nut
Assemble both Z Motor Brackets as shown in the images.
Side Panels
Requires:
- 2x Assembled Z Bracket
- 4x M3x20mm Bolt
- 4x M3 Spring Washer
- 4x M3 Hex Nut
Install the brackets onto the side panels. Take note that the side panel with the mounting holes for the controller goes on the left, and the panel with the mounting holes for the PSU on the right.
Horizontal Panels
Requires:
- 2x Assembled Side Panel
- 1x y-axis-front
- 1x y-axis-rear
- 1x frame-top-bar-front
- 1x frame-top-bar-rear
- 1x horizontal-brace
- 14x M3x20mm Bolt
- 14x M3 Spring Washer
- 14x M3 Hex Nut
Insert the five horizontal panels into the slots on one of the side panels. It may be helpful to lay the side panel flat so everything stays in place.
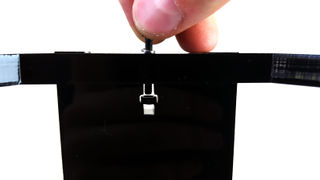
Take care in the orientation of the y-axis-front and y-axis-rear panels - they are not symmetrical. When viewed from the front, the y-axis-front panel should have a notch on the right-most screw hole (pictured below). The y-axis-rear panel should have the rectangular endstop cutouts to the left.
One of the z-top-panels has a cutout for wiring - this panel should be placed nearer the back of the printer, behind the other z-top-panel. If you're using the LCD add-on, swap the front-most z-top-panel out for the LCD cutout. The rear panel should have a cut-out for running cables to the LCD.
Place the remaining side panel on top of the horizontal panels, and fasten it in place. There are seven bolts to install on each side. Once done, flip the frame over (taking care to hold everything together) and fasten the other side panel in place.
Y Axis
Bed Support Plate
Bearings
Requires:
- 4x LM8UU Linear Bearings
- 8x Cable Ties
- 1x Bed Support Plate
Orient the bed support plate as shown - take note of the position of the four holes on each side of the plate, they should match the image. It is possible to build the bed plate upside down - that doesn't work too well, so double check the orientation before starting.
Sit the linear bearings in the cutouts on the bed support plate, and cable tie the bearings in place. Run one of the smooth rods through both sets of bearings to ensure that they are correctly aligned, and ensure the cable ties are fully tightened.
If the rod seems to get stuck in the bearing before pushing through all the way, do not force it through - this will likely damage the bearing. Gently withdraw the rod, and try again slowly - sometimes when inserting the rod the recirculating balls inside the bearing can get jammed, and forcing them can cause them to dislodge from the bearing.
Trim away the excess cable tie lengths.
Endstop Trigger
Requires:
- 1x M3x20mm Bolt
- 1x M3 Spring Washer
- 2x M3 Hex Nut
The Y endstop is positioned underneath the bed assembly. In order to actuate it, a bolt protrudes from the bottom of the support plate and makes contact with the switch. The position of the bolt can be changed to achieve different trigger points, which may be handy if you ever modify the printer. Install the bolt as shown in the hole third from the edge - this will allow for ~205mm of travel. Make sure that the bolt doesn't protrude more than a few millimetres past the end of the nut - otherwise it could press against the heated bed.
Belt Clamp
Requires:
- 2x Printed Y Belt Clamp
- 4x M3x20mm Bolt
- 1x M3x30mm Bolt
- 4x M3 Spring Washer
- 5x M3 Hex Nut
Select one of the printed belt clamps, and install the 30mm bolt and nut as shown. This clamp will be used to tighten the y-axis belt later. The other printed clamp does not need the bolt and nut installed - it only clamps the opposite end of the belt in place. Fasten both clamps to the bed support plate as shown, with the clamp featuring the nut and bolt nearer the front of the bed support plate (away from the endstop trigger bolt). For now, do not worry about tightening the bolts holding the clamps in place - they will need to be loosened and re-tightened later.
Y Motor
Bracket
Requires:
- 1x Y Motor Bracket
- 1x M3x20mm Bolt
- 1x M3 Spring Washer
- 1x M3 Hex Nut
Fix the motor mount in place as shown. Ensure the orientation is correct - the bottom of the acrylic part should be flat, while the top should have an angled cut towards the mounting tab.
Motor
Requires:
- 1x NEMA17 Motor
- 2x M3x15mm Bolt
- 2x M3 Spring Washer
- 1x GT2 Pulley
Insert the GT2 pulley onto the motor shaft, positioned as shown, and tighten the grub screws to hold it in place. Ensure one of the grub screws is directly over the flat of the motor shaft, in order to have the best grip possible.
Attach the motor to the bracket in the orientation shown, with the connector facing downwards.
Y Endstop
Note: it may be easier to do these steps in reverse order (e.g. install the endstop onto the bracket, then install the bracket in place) as the bolts can be difficult to reach once the bracket is in place.
Bracket
Requires:
- 1x Y Endstop Bracket
- 1x M3x20mm Bolt
- 1x M3 Spring Washer
- 1x M3 Hex Nut
Fix the endstop bracket in place, ensuring that it points upwards as shown.
Endstop
Requires:
- 1x PCB Endstop
- 2x M3x15mm Bolt
- 2x M3 Spring Washer
- 2x M3 Hex Nut
- 4x 3mm Plastic Spacer
Mount the endstop to the bracket as shown. Use a plastic spacer on each side of the PCB.
Motor and Endstop Wiring
Y Idler
Assembly
Requires:
- 1x Printed Y Idler
- 2x 624ZZ Roller Bearing
- 1x M4x20mm Bolt
- 1x M4 Hex Nut
Assemble the Y Idler as shown. Ensure that the bearings can spin freely.
Installation
Requires:
- 1x Assembled Y Idler
- 2x M3x20mm Bolt
- 2x M3 Hex Nut
- 2x M3 Spring Washer
Attach the Y Idler to the inside of the front Y panel as shown.
Install Y Axis
Rear Smoothrod Caps
Requires:
- 2x Smoothrod Cap
- 4x M3x20mm Bolt
- 4x M3 Hex Nut
- 4x M3 Spring Washer
Install the smoothrod caps onto the Y Rear Panel as shown. Ensure the caps sit as low (and hence as flush with the top of the Y Rear Panel piece) as possible.
Install Bed Support Plate
Requires:
- 1x Assembled Y Bed Support Plate
- 2x 8mm Smoothrod
Slide both of the smoothrods through the cutouts in the Y Front Panel as shown, and position the rods so that they are approximately centred in the cutouts.
Hold the assembled bed support plate in the middle of the printer, and slide one of the rods through one of the sets of bearings as shown. Once the smoothrod is through the bearings, push it back and guide it into the cutout on the Y Rear Panel. The smoothrod caps installed previously should prevent it from travelling any further. Repeat this process for the remaining rod.
Front Smoothrod Caps
Requires:
- 2x Smoothrod Cap
- 4x M3x20mm Bolt
- 4x M3 Hex Nut
- 4x M3 Spring Washer
Install the front two smoothrod caps to fix the smoothrods in place. At this point, you should check that the bed support plate can slide back and forth along the rods smoothly - it should be easily moveable by hand. If not, double check the previous steps and try and identify the problem.
Ensure that the endstop is triggered by the actuating bolt when the bed is moved all the way to the back of the axis - there should be an audible click as the switch is triggered.
Y Belt
Cut a 70cm long length of belt.
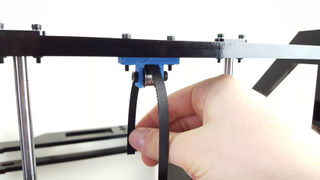
Move the bed support plate all the way to the back of the axis. Gently turn the printer over onto its back for easier access to the area underneath the support plate. Ensure that the belt clamp pieces are only loosely attached to the bed support plate. Fix the belt screw cap onto the end of the 30mm bolt as shown.
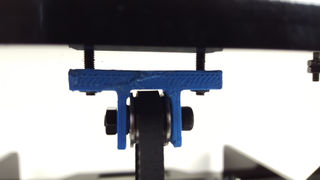
Run the belt around the Y idler bearings as shown, with the teeth on the inside of the belt path.
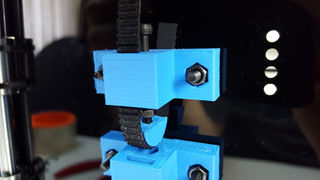
Pull the belt through, and push it through the rectangular slot in the uppermost Y belt clamp. Run the belt around the rounded end of the belt screw cap, and then slide the belt between the Y belt clamp and the bed support plate (the belt clamp needs to be loose to do this). Pull the belt out so that the end of the belt visibly exits from underneath the belt clamp. Ensure that the belt is centred underneath the clamp, and then tighten the two bolts that secure the belt clamp to the bed support plate. Once tightened, the belt should be clamped between the belt clamp and the bed support plate.
Loosen the Y idler as shown - this will provide more room to tighten the belt later.
Take the opposite end of the belt and run it around the motor pulley. Continue to pull that end of the belt up, and run it through the remaining belt clamp piece. Follow a similar process to clamp the belt between the clamp and the bed support plate as shown - ensure that the belt is as taught as possible before clamping it in place.
Once the belt is securely fastened at both ends, it is time to ensure the belt is correctly centred and tightened. There are two ways to tighten the belt - by tightening the two screws that hold the Y idler in place (which we loosened before installing the belt) and by tightening the 30mm bolt in one of the belt clamp pieces. While the printer is in this orientation it is easier to access the 30mm bolt than usual, so let's do the majority of the tightening there. Turn the bolt clockwise to tighten the belt - ensure that the belt screw cap stays straight (you may need to hold it loosely). As the bolt is turned, the belt screw cap should move and pull the belt tighter. If not, it is possible that the bolt is biting into the belt screw cap - the bolt should fit loosely inside the cap, and only the force of the belt pulling the cap back should keep it fitted to the bolt. If the bolt appears to be biting into the cap, remove the cap, ensure that the bolt cavity is clear of plastic, and try again.
Once the belt is nearly fully tightened, the final tightening can be done by tightening the bolts on the Y idler. Turn the bolts to move the Y idler closer to the frame again - but it's a good idea to leave a bit of a gap for future adjustments.
Heated Bed
Wrap Wiring
Cut a 40cm length from the provided spiral wire wrap. Use this spiral wrap around the wires connected to the heated bed as shown.
Attach to Support Plate
There are a few different ways to mount the heated bed - we have a recommended default configuration, but we'll take a moment to explain the different options.
Firstly, the bed can be mounted using either three-point or four-point mounting. Four-point (where a bolt is used in each corner of the bed) is more traditional and more common, and will likely result in the bed being more securely fixed in place (hence reduced wobble or vibrations). However, using four points can make it more difficult to get the bed flat, as it's possible to over-constrain (and hence bend or deform) the bed if the bolts are not applying an even and balanced pressure. Three-point mounting avoids these problems, but the bed may not be as securely fixed in place.
The bed support plate has mounting holes for both three and four point mounting - however using three-point mounting will require the bed to be rotated 180° from the default configuration, and this can complicate wiring. For simplicity we recommend four-point mounting, but the option is there if you wish to experiment.
Additionally, the way in which the bed can be fixed to the bed support plate can be varied. We recommend using springs to offset the heated bed from the support plate, and springs are included for this purpose. Supporting the heated bed on springs is a good idea because it provides some protection if the print head accidentally crashes into the bed surface - the bed will allow some downwards movement before things start to break. However, during very fast movements, the springs can cause the bed to vibrate or lag behind the motion of the Y axis slightly - this can cause minor print artifacts in external surfaces. This should not be a problem at the default or at most reasonable print speeds, but is something to be mindful of if experimenting with higher build speeds. In this case, we recommend swapping the springs out for plastic spacers - spare spacers are included in the kit for this purpose. Just remember to take extra care not to crash the HotEnd into the bed!
Due to the vibrations mentioned, it's possible for the bolts holding the bed in place to work themselves loose given enough time - we recommend using (and include) nyloc nuts to address this; once tightened they should not come loose easily.
With that in mind, fasten each corner of the bed in place as shown for the recommended configuration. Alternatively, configure the heated bed as you see fit.
Requires:
- 4x M3x20mm Countersunk
- 4x M3 Nyloc Hex Nut
- 4x Spring
Extruder Assembly (Single Extruder)
X Carriage
Front and Rear Pieces
Requires:
- 1x X Carriage Front
- 1x X Carriage Rear
- 4x LM8UU Linear Bearings
- 2x M3x30mm Bolt
- 2x M3 Spring Washer
- 2x M3 Hex Nut
- 6x M3 Plastic Spacer
Insert the LM8UU bearings into the cut-outs on the X Carriage Rear acrylic piece. Place the M3x30mm bolts through the top two screw holes, and use three spacers along each bolt to separate the two acrylic pieces, as shown.
Mounting Plate
Requires:
- 1x X Carriage Mount Plate
- 2x X Carriage Brace
- 2x M3x15mm Bolt
- 2x M3 Spring Washer
- 2x M3 Hex Nut
Attach the two brace pieces to the mount plate as shown. Note the orientation of the mounting plate - the endstop trigger (small hammer) should be on the left.
Attach Mounting Plate
Requires:
- 1x Assembled X Carriage Front + Rear
- 1x Assembled Mounting Plate
- 2x M3x30mm Bolt
- 2x M3 Spring Washer
- 2x M3 Hex Nut
Attach the mounting plate assembly to the front and rear X carriage pieces assembled earlier. For the time being, only fasten them together using the two bolts located at the bottom of the X carriage brace pieces (as shown). The remaining two bolts that enter into the mounting plate will be installed once the entire carriage is fitted on the X axis.
Fan
Requires:
- 1x Assembled X Carriage
- 1x E3D 30mm Fan
- 4x M3x20mm Bolt
- 4x M3 Spring Washer
- 4x M3 Hex Nut
Install the fan on the outside of the carriage as shown - the label on the fan should be facing inwards, nearer the body of the carriage.
HotEnd
E3D have detailed instructions for assembling both the Lite6 and V6 HotEnds available online. Follow the instructions they provide, but don't yet insert the PTFE tubing or power up the HotEnd. Leave the fan separate for the time being.
The fan provided by E3D does not come with a connector, and one is required to attach it to the printer's electronics. A kit is included with a connector, heat shrink and crimp-ferrules - repeat the same process used to wire the thermistor for the 30mm fan.
Prepare HotEnd
Insert the PTFE tubing into the HotEnd, as far as it will go. Refer to the documentation for the V6 and Lite6 if you're unsure if the PTFE is fully inserted.
Press the small printed circlip around the upper collar of the HotEnd, as shown.
Position HotEnd
Insert the HotEnd into the mounting bracket, using the circular groove to centre the HotEnd as shown. The circlip should sit between the HotEnd and the top of the mounting plate - again, make sure the circlip is above, not below, the acrylic.
Organise the HotEnd wiring at this point - route the wires around the fan and through the small cut-out in the mounting plate.
Extruder Base Block
Requires:
- 1x Metal Extruder Base Block
- 2x M3x10mm Bolt
- 2x M3 Spring Washer
Feed the PTFE tubing through the hole in the base block. The tubing may be a firm fit, but should press through with some force. Continue to feed the tubing through until the base block has come to sit above the HotEnd, then press the HotEnd into the base block.
Fix the base block to the acrylic plate using the two 10mm bolts.
Motor
Requires:
- 1x NEMA 17 Stepper Motor
- 2x M3x20mm Bolt
Attach the stepper motor to the base block as shown. Be sure to use the stepper motor provided with the extruder parts - it's a higher-torque motor than the others, in order to ensure smooth and reliable extrusion. The correct motor should be deeper than the others.
Install the motor with the connector facing upwards - away from the mounting plate on which the extruder sits.
PTFE
Requires:
- 1x MK7 Filament Gear
Slide the filament gear onto the motor shaft - it's unlikely to slide down all the way, as it will be blocked by the PTFE tubing. We are now going to cut the PTFE tubing as close to the gear as possible (the closer the tubing, the easier it is to print flexible filaments).
Using a sharp pen or pencil, draw the outline of the gear on the tubing. Remove the gear, then use a sharp pair of scissors (or other suitable tool) to cut around that outline as shown. Cut the other side of the tubing as shown.
After cutting, the tubing may be crushed or deformed - if so, use something 2mm in diameter (for instance, the smaller hex key) to ensure the inside of the tubing is circular and not crushed.
Filament Gear
Requires:
- 1x MK7 Filament Gear
Slide the filament gear onto the motor shaft, with the drive section nearer the motor as shown. Line the filament channel up with the PTFE tubing, and fix the gear in place. Make sure to align the gear's grub screw with the ground flat on the motor shaft - this will ensure a stronger grip.
Idler Arm
Assemble
Requires:
- 1x Metal Extruder Idler Arm
- 1x Spring
- 1x UNC 6-32x35mm Bolt
- 1x UNC 6-32 Nut
Insert the large bolt into the hole in the extruder idler arm. Slide the spring onto the arm, and then fasten it all in place by tightening the nut onto the end of the bolt.
Install
Requires:
- 1x Metal Extruder Idler Arm
- 1x Metal Extruder Spacer
- 1x M3x20mm Bolt
- 1x Large Washer
Insert the metal spacer inside the idler arm. Put the large washer on the M3 bolt, and then put the bolt through the spacer and idler arm. Using this bolt, attach the assembly to the motor as shown.
Use a small length of filament to check that it can move through the extruder and into the PTFE tubing without any issues. The drive gear should present some resistance - you may need to turn it by hand, or by using a pair of pliers gently. Check if the filament gets stuck on anything. When rotating the drive gear, the filament should move accordingly - if it does not, the PTFE tubing may need to be cut down slightly further in order to allow the gear and bearing to come closer together, gripping the filament.
Z Probe
Requires:
- 1x IR Z Probe
- 2x M3 Plastic Spacers
- 2x M3x15mm Bolt
- 2x M3 Spring Washer
- 2x M3 Hex Nut
The Z Probe is designed to mount to the same hole pattern as is used by the 30mm HotEnd cooling fan. The recommended mounting location is on the opposite side of the X carriage from the fan, as shown. Alternatively, the probe can be mounted directly to the cooling fan if preferred - but the offset values in the firmware will need to be adjusted accordingly.
Connect the provided cable to the Z Probe.
Print Fan
Requires:
- 1x Printed Fan Mount
- 1x 50mm Blower Fan
- 4x M3x30mm Bolt
- 4x M3 Spring Washer
- 2x M3 Hex Nut
Attach the fan to the printed mount as shown, then position the assembled fan and mount on the back of the extruder carriage. Do not secure the fan in place by fastening the bolts yet - leave the fan resting loosely on the carriage for the time being.
Wiring
If you haven't already, locate the cable for the stepper motor and connect it. Do likewise for the Z Probe, and check that everything on the X carriage that needs a wire or cable has one. Route all cables neatly and tightly to the top of the extruder assembly, and cable tie them in place as shown. Use the provided spiral wrap to bundle all of the wires together.
Extruder Assembly (Dual Extruder)
X Carriage
HotEnd
E3D have detailed instructions for assembling both the Lite6 and V6 HotEnds available online. Follow the instructions they provide, but don't yet insert the PTFE tubing or power up the HotEnd. Leave the fan separate for the time being.
Extruder
Follow the same process as used for the single extruder, but flip the second extruder around to suit.
Fans
Z Probe
Requires:
- 1x IR Z Probe
- 2x M3 Plastic Spacers
- 2x M3x10mm Bolt
- 2x M3 Spring Washer
- 2x M3 Hex Nut
The Z Probe is designed to mount to the same hole pattern as is used by the 30mm HotEnd cooling fan. The recommended mounting location is on top of the cooling fan on the right of the X carriage - in this orientation the cable will exit back towards the X carriage.
Wiring
- Spiral wrap
- Cable tie
X Axis
X Motor and Idler Assembly
Linear Bearing
Requires:
- 1x Printed X-Motor Part
- 1x Printed X-Idler Part
- 2x LM8UU Linear Bearing
Insert the linear bearing as shown. It should be a firm fit - you may need to use a hammer to gently tap the bearing in place. If the bearing is slightly loose, it can be clamped in place using two bolts through the part as shown.
Carriage Nut
Requires:
- 1x Printed X-Motor Part
- 1x Printed X-Idler Part
- 8x M3x15mm Bolt
- 2x Leadscrew Carriage Nut
Insert the carriage nut, and fasten it in place as shown. The bolts should bite into the plastic of the printed part quite firmly. Ensure that all of the bolts are equally tight and that the carriage nut is pressed flat against the printed part.
Rod Tighteners
Requires:
- 1x Printed X-Motor Part
- 1x Printed X-Idler Part
- 4x M3x15mm Bolt
- 4x M3 Hex Nut
There is a nut trap inside each of the cylindrical cut-outs for the smooth-rods. Insert a nut into each one, oriented so that a bolt can pass through it through the hole in the printed part. If the nut is incorrectly oriented, try tapping the part gently - if you're lucky, the nut should tend towards being correctly oriented. If you're unlucky, you might need to remove the nut and drop try to place it again. Once in the correct orientation, screw the bolt into (but not yet extending out of) the nut, as shown.
X Motor
Motor Pulley
Requires:
- 1x NEMA 17 Stepper Motor
- 1x GT2 Pulley
Install the GT2 pulley onto the stepper motor shaft, spaced as shown. Take care that one of the grub screws aligns with the flat of the motor shaft to ensure a good grip.
Motor Installation
Requires:
- 1x NEMA 17 Stepper Motor
- 3x M3x20mm Bolt
Fasten the stepper motor in place as shown. It is easier later to wire the motor with the cable connector oriented downwards. Check that the pulley aligns with the large rectangular cut-out for the belt as shown - some variation is OK, as long as the toothed area of the pulley falls within the rectangular slot.
Endstop
Requires:
- 1x PCB Endstop
- 2x M3x15mm Bolt
- 2x 3mm Plastic Spacer
Install the endstop as shown, taking care to orient it correctly.
X Idler
X Idler Tensioner Assembly
Requires:
- 1x Printed X Idler Tensioner
- 2x 624ZZ Bearing
- 1x 64-65cm of Belt
- 2x M4x20mm Bolt
- 2x M4 Hex Nut
Assemble the X Idler Tensioner as shown. Cut a 64-65cm long length of belt, and run it behind the bearings as shown.
X Idler Tensioner Installation
Requires:
- 1x Printed X Idler Tensioner
- 1x M4x20mm Bolt
- 1x M4 Hex Nut
Install the tensioner into the X Idler.
X Carriage Installation
Smoothrods in X Motor
Requires:
- 2x 8mm Smoothrods
Ensure the rod tightener bolts on the back of the X Motor part are fully loose (i.e. the bolts are not protruding through the nuts, and the nuts are recessed into the nut traps). Slide each smoothrod into one of the cutouts as shown, with the edge aligning with the edge of the printed part.
Turn the tightening bolts until they are hand-tight - the rods should be held in place by this.
Carriage on Smoothrods
Slide the assembled X carriage onto the smoothrods as shown. Take care when pushing the rods through the bearings - you should not need to force the rods through. If the rods seem to get stuck, carefully pull them out and try again.
X Idler
Slide the X Idler onto the remaining end of the smoothrods, leaving approximately 26-27cm between the inner edge of the X Motor printed part and the inner edge of the X Idler printed part. We will find the exact distance later - so for now we're just getting it in the right area.
Hand-tighten the rod tightener bolts to keep the X Idler in place.
Z Axis
Z Motors
Requires:
- 8x M3x15mm Bolt
- 8x M3 Spring Washer
- 2x NEMA17 Stepper Motors (34mm)
- 2x 8mm Couplers
Fix the Z motors in place as shown. Attach a flex coupler to each motor, with the motor shaft entering the smaller size of each coupler. Tighten the outer bolt to clamp the coupler in place. The lower edge of the coupler should roughly align with the top of the acrylic piece - if in doubt, err on the side of higher rather than lower.
Z Smoothrods
Requires:
- 2x Z Smoothrod Cap
- 2x 8mm Smoothrod
- 4x M3x20mm Bolt
- 4x M3 Spring Washer
- 4x M3 Hex Nut
Install both Z smoothrod caps as shown. It can be easier to put the bolts through the smoothrod cap, and partially fasten each nut - the assembled part can then slide into place, and the bolts tightened.
Slide the smoothrods down through the hole in each cap, and into the corresponding hole in the Z motor bracket as shown.
Installing X Axis
Gently slide the heated bed as far towards the front of the printer as it can go.
Position the assembled X axis over the Z motors as shown. Start with the left side, lift the Z smoothrod up and then slide it back down through the bearing in the X Motor part of the X axis. Re-insert the Z smoothrod into the hole in the Z motor bracket.
Rotate the X axis towards the second Z motor, and repeat the process - lift the smoothrod, and lower it into the bearing in the X idler part. If the spacing between the X motor and X idler is not correct, you will need to loosen the bolt tighteners on the back of the X idler and move it along the X smoothrods as you align it with the Z smoothrod.
Once both ends of the X axis are fitted to the Z smoothrods, gently lower the X axis as far down as it can go. If you've moved the heated bed fully forwards, the HotEnd nozzle should miss the bed and move below the bed height in the area of the heated beds wiring - ensure that the nozzle does not press forcefully on this wiring. Both ends of the X axis should be able to rest on top of the couplers attached to the Z motors as shown.
Secure Z Smoothrods
Requires:
- 2x Smoothrod Cap
- 4x M3x20mm Bolt
- 4x M3 Spring Washer
- 4x M3 Hex Nut
Position the smoothrod caps on top of the Z smoothrods - the smoothrods should be protruding slightly above the Z smoothrod caps that they are going through. Fasten the smoothrod caps in place above the smoothrods, and tighten the bolts to clamp the smoothrods down.
Install Leadscrews
Requires:
- 2x Leadscrews
Lower the leadscrews into the carriage nuts - they should turn fairly easily and move downwards. The leadscrew should enter the top half of the coupler - some force may be required, but it should not be too excessive. Check that both leadscrews are inserted to an equal depth (compare the height at the top of each leadscrew) and if they're both fully inserted, tighten the Z coupler around the leadscrew.
Now that the leadscrews are installed, the Z axis should no longer be able to move up or down freely. To manually move the Z axis, turn both of the couplers in equal direction and measure - be careful not to let one side of the axis get too much higher or lower than the other side, otherwise things can get stuck.
Generally when the printer is in action it's not a good idea to manually move the axis up or down - but while the motors aren't being actively driven it's not a problem.
Confirm X Spacing
Lower the Z axis to its lowest point - right up to resting on the couplers if possible. Check that both rods appear to be straight, with no noticeable bend - we want to make sure the X axis isn't pulling the Z rods inwards or pushing them outwards, as this can cause print problems. The X pieces should naturally space themselves correctly if one of the end pieces is free to move - so if in doubt, loosen the rod tighteners on the back of the X idler, move the Z axis up and down a little, and re-tighten with the Z axis fully lowered.
If the Z axis can move across its full range of travel - from the very bottom to the very top - without a noticeable change in the effort it takes to turn the couplers, then everything should be spaced correctly. If the X axis is spaced incorrectly, it will usually be more difficult to move up or down the closer the Z axis is to the bottom.
X Belt
Requires:
- 2x X Belt Clip
- 2x M3x30mm Bolt
- 2x M3 Spring Washer
- 2x M3 Hex Nut
Take the length of belt cut earlier, and (if it isn't still in place) run it through the idler. Proceed to run the belt along and parallel to the smoothrods, through the carriage, and around the pulley attached to the stepper motor, as shown.
Next, take the two printed X Belt Clips, and orient them relative to the X carriage - the flattened rounded edge of the printed part should face downwards, and the side with the cutout for the belt should face towards the back of the printer.
Press each end of the belt into one of the plastic parts, leaving approximately 5-10mm of belt extending out the end of the clip. Ensure the belt is fully inserted - it's a tight fit, using a pair of pliers to pull on either end of the belt can make it easier.
Once both clips are attached to the belt, slide one of them into the X carriage as shown. Retract the bolt that holds the print fan in place, and align the holes in the clip with the hole for the fan bolt, along with the hole for the bolt that goes into the extruder mount plate (which we left out earlier). Once aligned, press the bolt holding the print fan through the belt clip, and through the hole in the front of the carriage. For the time being, do not secure this bolt in place.
Repeat this process for the remaining clip - retract the fan bolt, insert the clip, and fix the clip in place with the fan bolt. Once both clips are in place, take the two remaining 30mm bolts, and slide them through the remaining holes in the back of the X carriage - as with the fan bolts, these bolts should go through the belt clips, and out the front of the carriage.
At this point we can test the tightness of the X belt - turn the bolt protruding from the end of the X Idler tensioner, and the belt should be pulled outwards. The tensioner only has a short travel range - it's likely that the belt will initially be too loose. If this is the case, remove the bolts holding one of the belt clips, pull the belt out of the clip, trim the belt a short amount, and repeat the process. Ideally, the belt should be tight enough to produce an audible twang - like a guitar string - when plucked. It's a good idea to leave a bit of room in the tensioner for future adjustment, so if you have the tensioner fully tightened to achieve this, cut the belt slightly shorter and try again.
Final Touches
Spool Holder
Requires:
- 1x 8mm Smooth-rod
- 2x Printed Spool Holder Adaptor
Press each end of the smooth-rod into the printed adaptors. Insert the assembly into the cut-out on the printer frame, as shown.
Ideally the rod would fit tightly inside the printed pieces, however it is easy to damage the parts if they are too tight. A drop of superglue inside each printed part should fasten it securely to the smoothrod, and make changing spools easier in future.
Fan Duct
Requires:
- 1x Printed Fan Duct
Take the included fan duct and attach it to the end of the fan mounted to the rear of the extruder carriage. The duct should press on with minor force and stay in place. The duct will likely have a little room to tilt up or down - ensure that the duct is tilting downwards, so that the end of the duct is facing the tip of the nozzle (and below), and not the top of the nozzle or above.
