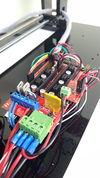
Mark2 Electronics Installation
Power
| Caution: | The power supply has a switch to select between 110/240V. Please make sure the power supply is set for the appropriate voltage for your region before connecting it to power. |
Mains Power Connector
Requires:
- IEC320 Mains Socket Panel
- 2x M3x20mm Countersunk Bolt
- 2x M3 Hex Nut
The mains power panel allows the use of a disconnect-able power cable, and makes it easy to quickly switch power on or off if needed. Bolt the panel in place as shown, it should sit flush with the acrylic panel.
Wiring
Requires:
- 1x Mains Harness
- 1x 12V Harness
- 1x 12V Power Supply Unit
- 1x IEC320 Mains Socket Panel
It is easiest to wire the power supply before mounting it in place. Begin with the mains wiring harness.
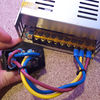
Loosen the screws on the L, N and G terminals of the power supply. Insert the forked end of each length of wire into one of the terminals, matching the colours with the images, and re-tighten the terminal so that the wires are held in place. Attach the other ends of the wires to the mains input panel as shown. In addition to the wires from the PSU, install the small brown cable between two of the pins on the input panel as shown. The crimp connectors fit firmly, and it may be easier to grip them using a pair of pliers during installation.
Double check that you've installed the wires as shown in the images. Incorrect wiring poses a hazard, and may trip your circuit-breaker.
Next, connect the 12V wiring harness to the power supply. Connect the two red wires to the terminals marked positive / V+, and the two black wires to the terminals marked negative / V- (as shown).
Power Supply
Requires:
- 1x 12V Power Supply Unit
- 4x M3x15mm Bolt
- 4x M3 Spring Washer
- 4x M3 Plastic Spacer
Attach the power supply to the inside of the printer frame as shown. The bolts will only enter a short way into the power supply, so be sure to use plastic spacers between the power supply and the acrylic panel. Because the bolts only enter a short way into the power supply, it can be difficult to get all four bolts to align - this is easier if you do not tighten any bolt fully until all four bolts are partly fastened.
RAMPS Installation
Jumpers
Requires:
- 1x RAMPS Board
- 15x Jumpers
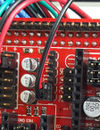
A bag of jumpers is provided with the RAMPS board. These jumpers need to go over the pins that sit underneath each stepper driver - place the jumpers as shown.
Stepper Drivers
Requires:
- 1x RAMPS Board
- 5x A4988 Stepper Drivers
- 5x Heatsinks
Insert all five of the provided stepper drivers into the RAMPS board as shown, taking care to orient them correctly. Attach one of the provided heatsinks to the large black IC on each driver, by removing the coating on the adhesive sticker and pressing the heatsink onto the IC. Take care that the heatsink does not press against any of the metal pins on each side of the drivers.
Mounting
Requires:
- 1x Arduino Mega2560
- 1x RAMPS Board
- 3x M3x30mm Bolt
- 3x M3 Hex Nut
- 3x 3mm Plastic Spacer
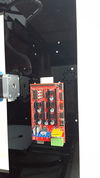
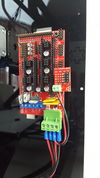
The RAMPS board plugs directly into the top of the Arduino Mega 2560 as shown. Both boards are then fastened to the side-panel using 3 sets of bolts, spacers and nuts, as shown. For the neatest wiring setup, the RAMPS / Arduino should be installed on the inside of the frame. However, if you intend to extend the X axis later, or if you are planning on frequently adjusting the wiring, it may make more sense to install the board on the outside of the frame.
RAMPS Wiring
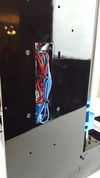
Quite a few wires and cables get plugged into RAMPS - it can become a mess really quickly if you don't keep on top if it while wiring. Use cable ties and adhesive mounts to fix wires to the frame. To keep things a little tidier, you can tuck some of the wires underneath the RAMPS board, in the cut-out in the frame as shown.
Power Input
- 1x 12V Wiring Harness
- 1x MightyFan Board
Run the 12V harness along the back of the printer, and up to the RAMPS board. Connect the wires to the power input terminals, noting the polarity as marked on the PCB. It may be easier to remove the terminal block from RAMPS, then re-insert it after wiring. Two additional wires are provided to power the fan expansion board - connect them to the provided MightyFan board, again noting the polarity as marked.
Once wired, connect both the power terminal block and the MightyFan board to RAMPS as shown.
Extruder
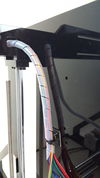
We'll start by connecting all the wires coming from the extruder / X carriage. Route the wires through the cut-out in the rear top panel. Use a cable tie and an adhesive mount to fix the bundled wires in place alongside the RAMPS board as shown - this is to protect the connectors from any motion of the printer during operation.
Do not pull the wires too far through the cutout - there needs to be enough slack for the extruder to reach the furthest point, which occurs with the X axis all the way to the left and the Z axis all the way down. Manually move the axes to this position and check that the wires reach.
Motor
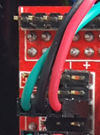
Connect the cable for the extruder's stepper motor as shown. All of the stepper motor cables should be installed with the connector facing the same way - with the green wire at the top, and the red wire at the bottom.
Z Probe
Connect the Z probe to the Z-Min endstop connector - on the top-left side of RAMPS, it's the second of the 3-pin connectors (going downwards, not counting the 4-pin connector at the top).
Thermistor
Connect the thermistor to the bottom two of the six thermistor pins. Polarity doesn't matter.
Fan Wiring
In a single-extruder setup, RAMPS has one connection dedicated to controlling a fan. However, we need to run two fans (technically we only need to control the print fan, the HotEnd fan just needs to be on whenever the printer is running). To make this easier, each Mark2 kit comes with a MightyFan expansion board which plugs directly into RAMPS. For additional information, refer to the MightyFan page.
Connect fans in order (bottom to top):
- HotEnd 1 Fan
- Print cooling fan
- HotEnd 2 Fan (Dual-Extruder Only)
- Not Connected (Firmware configured for electronics fan)
Heater
Connect the HotEnd heating element (blue wires) to the screw terminal marked D10. Polarity does not matter. You may need to strip the wires back slightly before inserting them in the screw terminal.
Heated Bed
Thermistor
Connect the heated bed thermistor immediately above the HotEnd thermistor, to the middle two thermistor pins.
Heating
Connect the two heated bed wires to the screw terminal D8. Polarity is important here, so match the wire colours to the markings on the board.
Motors
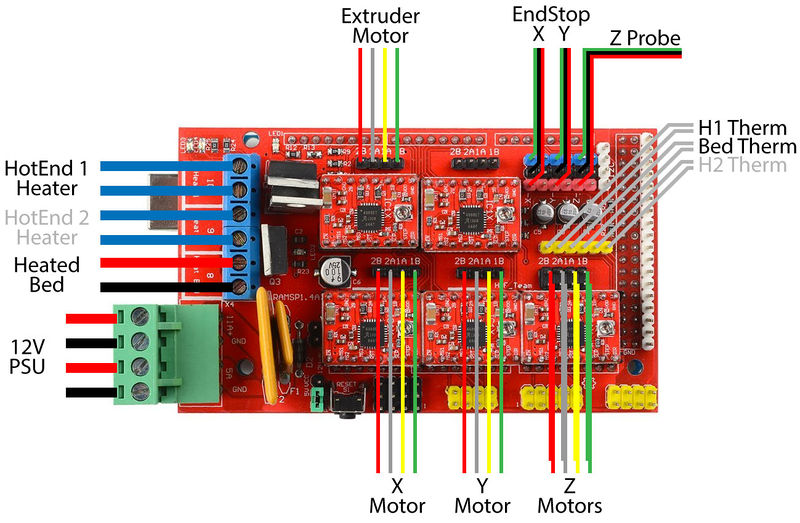
The remaining motors (X, Y, and 2 x Z) connect in the same manner as the extruder motor, and with the connectors in the same orientation. Check the wiring diagram to see where each motor connects.
EndStops
Locate the correct cables, and plug in both of the endstops - one for X, and one for Y. Use spiral wrap to bundle the X motor and X endstop wires together, and route these wires around the outside of the frame.
Optional: LCD Add-on
Mount LCD Control Panel
- 1x LCD Control Panel
- 4x M3x20mm Bolt
- 4x M3 Hex Nut
Insert the control panel behind the cut out in the frame, and fasten it in place. Take care not to over-tighten the bolts, as they may place a strain on the control panel's PCB.
Connect Cables
- 1x Control Panel Adaptor Board
- 2x 10-Pin Ribbon Cable
The adaptor board connects directly to RAMPS as shown. The two cables then connect between the adaptor board and the control panel. Use the cut-out in the rear top-panel to route the cables to the control panel.
Optional: Raspberry Pi
The Mark2 frame has mounting holes for a Raspberry Pi model A+, B+, or Pi 2 B, which can be handy if you want to set up an OctoPrint server to control your printer remotely.
Other Electronics
Frame also has mounting points for these RAMPS alternatives:
- Melzi
- Smoothieboard
Other Resources
http://reprap.org/wiki/RAMPS_1.4
http://www.reprap.org/mediawiki/images/0/06/RAMPS_dossier.pdf
http://reprap.org/wiki/Prusa_i3_Rework_Electronics_and_wiring
http://www.nextdayreprap.co.uk/wiring-reprap-prusa-mendel-build-manual/


